Elevating Digital Art Workflows with Procreate Galactic Brushes
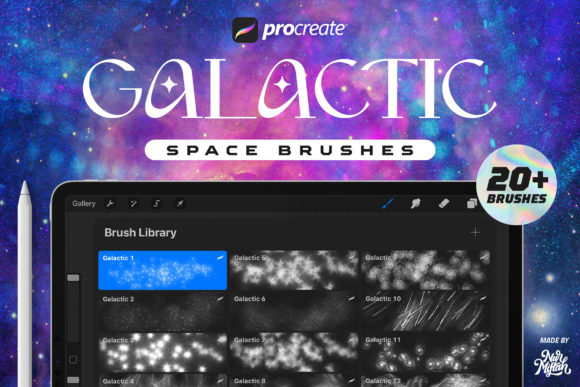
In the rapidly evolving landscape of digital illustration, the difference between a good piece and a great one often lies in the texture and depth of the assets used. For professionals and hobbyists alike, finding tools that seamlessly integrate into an existing workflow while offering unique visual capabilities is essential. Procreate Galactic Brushes represent a specialized set of digital tools designed to bridge the gap between standard illustration and cosmic realism. This collection, featuring 20 distinct brushes, is not merely a decorative add-on but a functional asset for creators looking to enhance backgrounds, design social media assets, or craft compelling book and movie covers.
Understanding where these brushes fit into a broader creative process requires looking beyond the immediate stroke. Whether you are a marketer designing a campaign visual, an educator creating engaging learning materials, or a freelancer delivering high-end client work, the integration of high-quality textured brushes can streamline production time while elevating the final output. The key to maximizing the value of Procreate Galactic Brushes lies in preparation, compatibility awareness, and strategic application within your project timeline.
Technical Foundation and Compatibility Planning
Before diving into the creative execution, it is crucial to address the technical environment required for these tools. These brushes are engineered specifically for the iOS ecosystem, functioning exclusively within the Procreate application. A common pitfall for many creators is attempting to import specialized brush sets into incompatible software. It is important to note that these brushes do not work in Photoshop or other desktop-based graphic design applications. Ensuring your workflow is centered around an iPad running Procreate is the first step in successful implementation.
Regarding version control, these assets offer flexibility for users with varying update schedules. They are fully optimized for Procreate 5X, taking advantage of the latest rendering engines, yet they maintain backward compatibility with earlier versions of the app. This ensures that small business owners or educators who may not have immediately updated their software can still incorporate these tools without disruption. Before beginning a project, verify your app version to guarantee that the complex shapes and textures render correctly, preventing potential quality control issues down the line.
The Anatomy of the Brush: Realism Through Composition
The effectiveness of any digital tool stems from its underlying construction. These 20 galactic brushes are distinguished by their source material; they are crafted from a combination of real space objects. Unlike procedurally generated noise patterns that can feel repetitive or artificial, this approach grounds the texture in reality. Each stroke contains a multitude of shapes, mimicking the chaotic yet organized nature of star fields, nebulae, and cosmic dust.
Made with care, the image quality of these brushes is optimized for high-resolution outputs. This attention to detail is vital for professionals producing assets for print, such as book covers or movie posters, where pixelation or low-resolution textures can undermine the perceived value of the work. When planning your canvas settings, consider the intended final medium. If the end goal is a large-format poster, start with a high-DPI canvas to ensure the intricate details within each brush stroke remain crisp upon export.
Optimizing Visual Impact: The Black Background Strategy
To achieve the intended aesthetic, the environment in which you paint is just as important as the brush itself. The documentation for these brushes highlights a specific condition for optimal realism: they will look significantly more authentic when used on a black background. This is not merely a stylistic suggestion but a functional requirement based on how light and color interact in space imagery.
In a practical workflow, this means setting your base layer to pure black (#000000) before applying the galactic strokes. Doing so allows the lighter elements of the brush—the stars, gas clouds, and particulate matter—to pop with maximum contrast. If you apply these brushes over a white or light-colored background, the transparency and blending modes may not behave as expected, resulting in a flat appearance that lacks the intended depth. For designers creating social media assets or dark-mode UI illustrations, starting with a dark canvas aligns perfectly with current design trends while maximizing the utility of this specific toolset.
Integrating into Professional Workflows
The versatility of Procreate Galactic Brushes allows them to be inserted at various stages of a project, depending on the specific needs of the task. Here is how different types of creators can integrate these tools into their daily operations:
- Background Creation: For illustrators and concept artists, generating complex space backgrounds from scratch can be time-consuming. These brushes serve as a rapid prototyping tool. You can block in the general composition of a galaxy or star field in minutes, then refine specific areas with custom painting. This accelerates the initial phase of the project, allowing more time for foreground character design or lighting adjustments.
- Marketing and Social Media: Marketers and content creators often need eye-catching visuals to stop the scroll. Using these brushes to create dynamic headers, story backgrounds, or promotional graphics for tech products, sci-fi events, or educational content about astronomy can provide a professional edge without requiring advanced 3D modeling skills.
- Publishing and Cover Design: Authors and self-publishers frequently struggle with cover art budgets. By utilizing these high-quality brushes, a designer can create a bespoke, genre-appropriate cover for science fiction novels or non-fiction books about space exploration. The variety of shapes in every stroke ensures that no two covers look identical, maintaining uniqueness for the brand.
- Educational Materials: Educators developing digital textbooks or presentation slides can use these assets to create accurate and engaging visual aids. The use of real space object data adds a layer of scientific credibility to diagrams and illustrations used in classrooms or online courses.
Execution and Layer Management
Efficient use of these brushes requires a disciplined approach to layer management within Procreate. Because each stroke contains many shapes and detailed textures, rasterizing them too early can limit your ability to make adjustments. A best practice is to keep different elements of your galactic scene on separate layers. For instance, place dense nebula clouds on one layer, distant star clusters on another, and bright foreground stars on a top layer.
This separation allows for non-destructive editing. You can adjust the opacity, blend mode, or hue/saturation of specific elements without affecting the entire composition. If a certain area feels too crowded, you can simply mask out parts of that specific layer rather than erasing permanent pixels. This method supports a flexible workflow where decisions about composition and color grading can be made late in the process, accommodating client feedback or personal creative shifts.
Furthermore, experimenting with blend modes such as Screen, Add, or Color Dodge can enhance the luminosity of the galactic effects. Since the brushes are designed with transparency in mind, overlapping strokes on different blend modes can create complex interference patterns that mimic real astronomical phenomena. This level of control transforms the brushes from simple stamping tools into dynamic instruments for light painting.
Long-Term Asset Management and Support
Incorporating new tools into a permanent library requires organization. Once imported, categorize these 20 brushes within a dedicated group in your Procreate brush library. Naming conventions should be clear and descriptive to facilitate quick retrieval during high-pressure deadlines. Over time, as you develop a signature style using these assets, you may create preset color palettes that complement the galactic themes, further streamlining your setup time for future projects.
It is also worth noting the importance of support channels when adopting new digital assets. If you encounter installation issues or have questions regarding specific functionalities, reaching out to the creator is recommended. Direct communication can resolve compatibility quirks or provide advanced tips that are not immediately obvious from the product description. Maintaining a line of contact ensures that your investment remains viable even as software updates occur.
Ultimately, the goal of using Procreate Galactic Brushes is to enhance efficiency without sacrificing quality. By understanding their technical constraints, optimizing the canvas environment, and integrating them thoughtfully into your layer structure, you can produce stunning, realistic space-themed artwork. Whether for a commercial campaign, a personal artistic pursuit, or an educational resource, these tools offer a robust solution for bringing the cosmos to life on your iPad. Enjoy the process of creation, and let these carefully crafted brushes expand the horizons of your digital artwork.